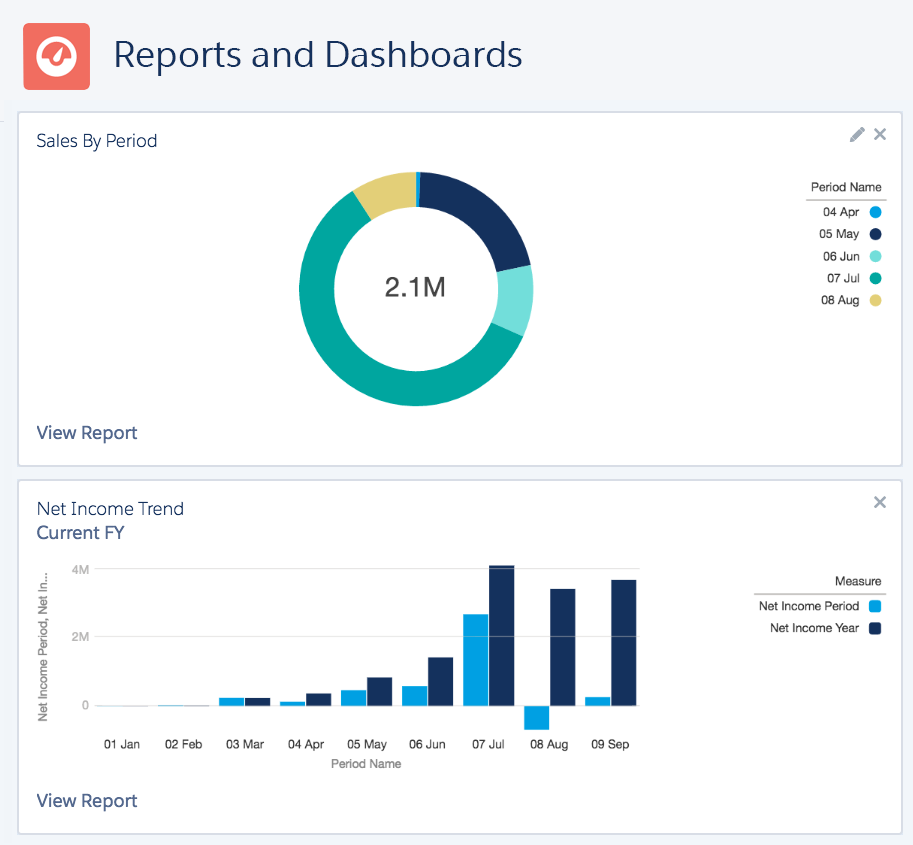
This is the third article in the series FIVE different reporting technologies included in Sage Financials.
- Key Financial Reports
- Salesforce Reports
- Sage Intelligence
- Einstein Analytics
- Financials Reporter
Sage Intelligence
Sage Intelligence is a separate cloud based application that gives great flexibility to create the kind of reports your accountant will love, as well as making Dimension data reporting simple. However this means you have to transfer data from Sage Financials to Sage Intelligence, so you are always looking at a snapshot rather than real-time data.
You launch Sage Intelligence from Sage Financials on the Salesforce platform by navigating to the ‘Financial Reports’ Tab and clicking on [Sage Intelligence]. This opens up a separate cloud based application and the first step is to copy data from Sage Financials into Sage Intelligence:
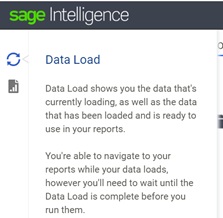
When you open Sage Intelligence you may see the spinning arrows icon ![]() in the top left which indicates data is being loaded from Sage Financials. If you click on the icon you can see more detail:
in the top left which indicates data is being loaded from Sage Financials. If you click on the icon you can see more detail:
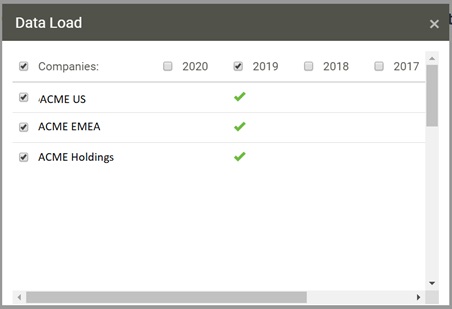
And if you click on ‘Data Load’ you can configure which data should be downloaded. This opens the Data Load window which enables you to select the Companies and the Financial Years you want to report on. Keeping this to the minimum will of course speed up the Data Load.
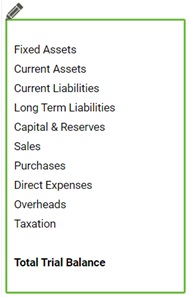
Creating a detailed Trial Balance
Sage have pre-configured a number of ‘Standard Reports’ which will work if you haven’t made changes to your Chart of Accounts. They only report at the Account Class level so should be fine unless you’ve made major changes to the Chart of Accounts. Having said that, Trial Balance at the Account Class level is not very useful, so roll-up your sleeves and we will go through producing a full detailed Trial Balance report.
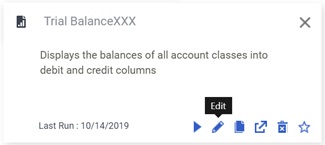
You cannot edit ‘Standard Reports’ but you can copy them – click on the Copy icon:![]() to create a copy in ‘My Reports’. Then if you click on Details for the copied report you get to click on the Edit icon:
to create a copy in ‘My Reports’. Then if you click on Details for the copied report you get to click on the Edit icon:![]()
This opens the Report Editor window which allows you to define rows:
And Columns:

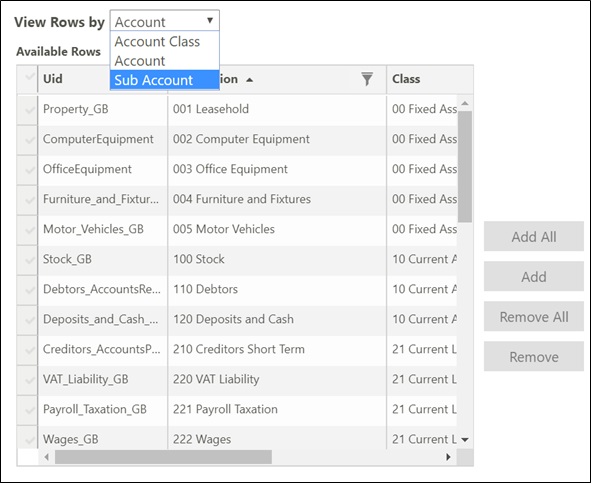
The Columns are fine, so looking at the rows, when you click on the Row Editor you see this panel on the right:
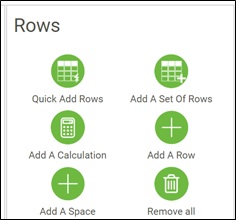
Rows can be Account Classes, Accounts, Sub Accounts, Calculations or free-text. You can add rows one-at-a-time, but its much faster to use ‘Add A Set Of Rows’ but first click [Remove all], then click [Add A Set Of Rows]
For a detailed Trial Balance you will want Sub Accounts. Choose this ‘Sub Account’ in the pick-list and click the ‘Description’ columns to sort correctly, click [Add All] and finally click [Add].
Then click the ‘Save’ icon on the right ![]() and then you can click the Run icon
and then you can click the Run icon ![]() to display the report you have just configured.
to display the report you have just configured.
You can further enhance this by adding a Total row at the bottom (using the [Add A Row] button). You can do this using a Calculation Row, but as you have to specify each Row you want to add together, an easier way is to add all the Account Class’s as rows, but then edit them so they are hidden. Then add a Calculation Row for the Total, adding all the Account Classes together: (You have to click the ‘+’ in the ‘keypad’ section). That way you only have to add 10 or so rows.

Now if you run the report you should see a Totals row with balancing Credit & Debit. You could also add free-text rows to break up the Assets, PnL etc.
Columns & Dimensions
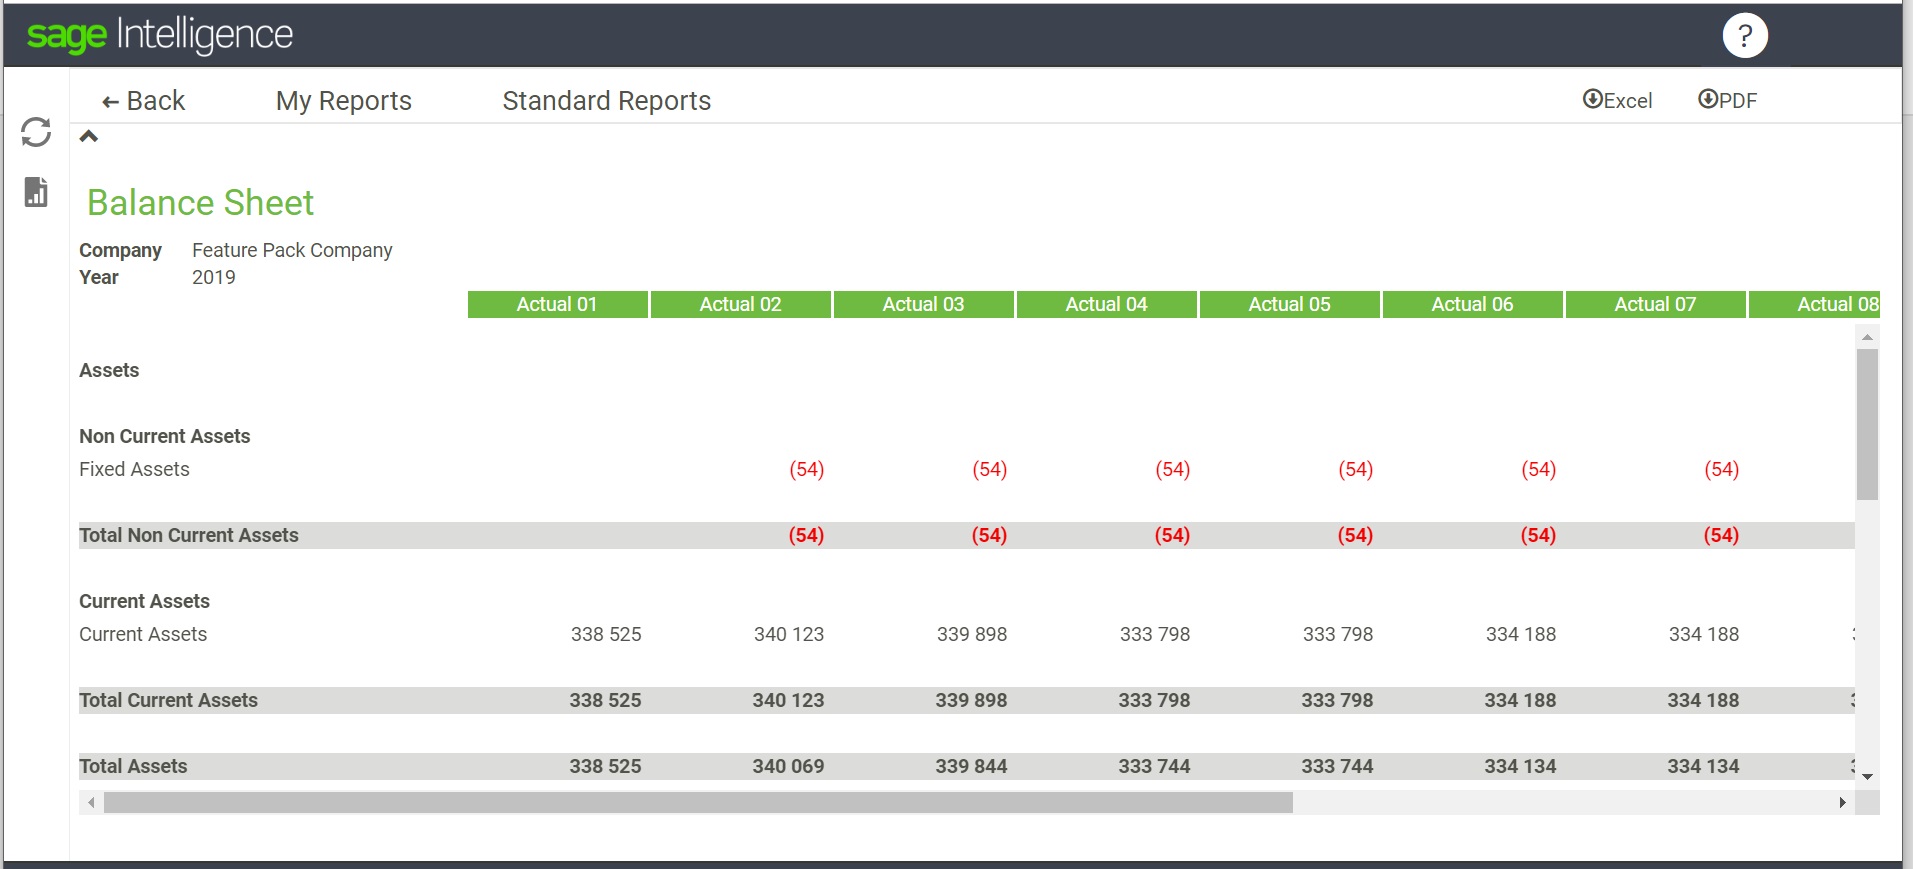
The Trial Balance only displays Debits, Credits & Prior year, but you can display much more than that. The Standard Report ‘Balance Sheet – Actual 1 to 12’ for example displays each of the 12 periods as columns:
To see the full list of column options, click on the Columns pencil icon:

This displays the Columns panel on the right hand side

Choose [Add A Set Of Columns] to see the column options:
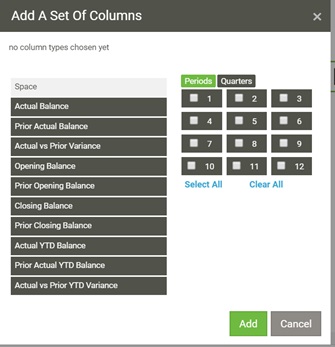
As with rows you can also add calculation columns, but more interestingly you can add Dimension Tags which enables you to create a PnL by customer, or project etc.
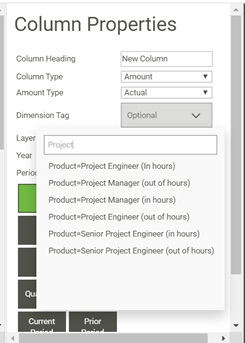
Click [Add a Column] and then click on the ‘Dimension Tag’ (Optional) pick list. Then you can search for the Tag you want to display:
Export
Finally, Sage Intelligence allows you to export the reports you have created to Excel. In the top right of the report page, simply click on the ![]() button.
button.
That’s it for now and I hope you found that whistle-stop tour useful. If you are looking for training on reports, please fill in the Alpha Index enquiry form and we would be delighted to help out.
Did you find this useful? Please register to receive regular updates from Sage Financials knowhow.